Monday, May 28, 2018

Retrobox 2TB


           Last week I got a request for one of my modified Original Xbox consoles. I have been making these for some years for fellow retro gaming nuts like me. I loved the Amusement Arcades in the 80`s, growing up in Ireland we had to travel to Buncrana in Donegal to experience the full on beach and arcades experience similar to Scarborough or Skegness etc. With little money I was more an Arcades Urchin, watching older lads throw coin after coin into the same machines to better their high scores. They say as we get older we want to own the things that we didn`t have as kids or could not afford, this is so true!
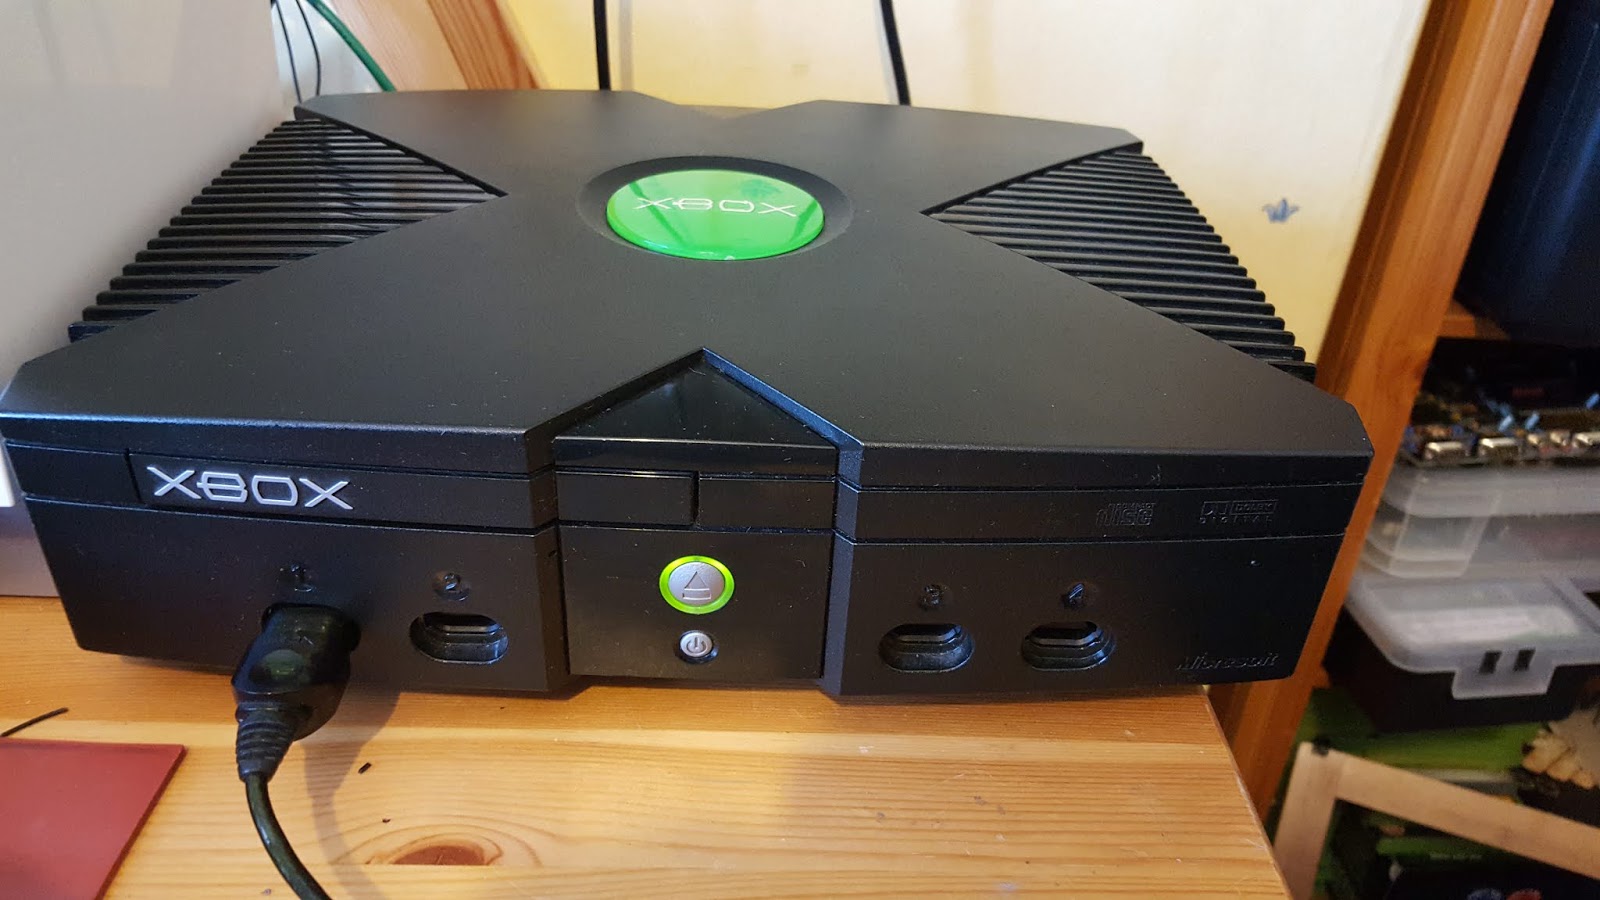


       Enter this PC based behemoth form Microsoft in the early 2000`s, built like a tank, no red rings of death here. For anyone into emulation, this is still in my eyes the best retro friendly console available. The Raspberry Pi just aint got the capabilities for 16 bit and above. There are limitations, Playstation platforms are about as much as you`ll push from this fella but all the others along the way more than make up! 
        I like a modchip as I don`t care for softmods and cloning drives and worrying about people messing the drive. Aladdin XT is the choice chip these days as only used variations of X-ecuter or variations are available for extortionate prices on Fleabay and Amazon.
Quite a simple install as a lot of wires are now not required to disable/enable the modchip as the old Xbox Live service is switched off.


     Here I fitted an Aladdin XT plus 2 to a version 1.6 motherboard, the latest version before Microsoft ended manufacture. Most of the soldering work is underneath the motherboard, versions 1.0-1.5 do not require so much soldering. The modchip is mounted on a pin header, as are most original modchips. I do a full strip down and deep clean of all parts before any modification, check the fan is good and most importantly do a thermal paste change on the CPU and GPU processor heat-sinks.


       With both heat-sinks removed, you can see the obvious clean up and replacement needed. The old compound is now doing nothing, baked on like concrete and having zero thermal transfer properties.


   I have tried a lot of different weird and wonderful named products to remove the compound I like a  standard WD40 soak followed by a clean with isopropanol or if really stubborn I break out the Acetone. 


 I leave the WD40 to soak for
 a few minutes then gently use
 my pry tool to agitate rather   than scrape the surface.


      Lint free cloth and some cotton buds with a little elbow grease and the heat sinks are as good as new. 


      I like to use Noctua thermal paste NT-H1 as its served me well on laptop and pc cpu upgrades but any decent branded compound will be fine.


     Next  ,as the console has been chipped , a brand new hard drive is essential as the stock drive is limited to 10GB and worse still is IDE. I fitted a SATA to IDE adaptor and replaced the stock ribbon cable with an Ultra ATA 80 Pin ribbon cable to improve hard drive recognition times. I fitted a brand new 2TB Seagate Barracuda sata drive I ordered from Ebuyer.


      The replacement Ultra ATA ribbon cable was longer than the stock cable so some origami was necessary to get it to fit properly. 


      Assembly finished it was now the long task of uploading via ftp my custom menu and all the emulators and Original Xbox games. Any remaining space would be kept for save games and movies converted to play using the Xbox codec. All emulators are set up to save to the hard drive and the video output of the console is modified to HD for use on modern LCD/LED displays.


       I have a web page that showcases my Retrobox and have made a small Youtube channel that shows the box in all  its retro glory!

http://martylynch07.wixsite.com/retrobox

Menu`s   -   https://www.youtube.com/watch?v=rrOO0O3-G40&t=6s

Arcades -    https://www.youtube.com/watch?v=GaFCj0vYX4g

1TB       -    https://www.youtube.com/watch?v=Vm6mNlcgNoM&t=1s

Below are some of my own favourites!


Saturday, May 19, 2018

ZX Spectrum 48K

        Was it Christmas, birthday, or just because we begged?
Sadly I can`t remember but me and my brother so wanted one of these machines. Spending long hours at friends who owned one, finally it arrived as the biggest distraction of our childhood. Played to death until replaced by newer technology, yes I said played, no serious functions needed here, where`s the joystick plug in..... Well loved and an 8bit memories machine, time it got a makeover!

     Having been stored in the attic, a roof leak many years ago had killed the original mobo. No amount of drying could fix it, it never booted and sadly got ditched, in hindsight many spare parts may have been recoverable.  Ebay was my usual port of call and unfortunately this time it wasn`t going to be easy. Most Spectrum motherboards have had some sort of intervention over the years and mine was going to need more than I bargained for. This one almost got abandoned!

   So the original parts have wear, usual stuff, worn keyboard membrane, print worn on key mat buttons and face plate not looking too clever. I ordered Chinese replacements from Retroradionics.
I think around the $30 mark, took a month or so but I was half way there. The motherboard I got from Ebay was more than problematic,  ram had been tampered with and the board had a mountain of issues.


As you can see in the photo the lower ram (mobo upside down) so top right has had a socket fitted. This version has the old style voltage regulator strapped to the massive heat-sink. I replaced as many capacitors as I could and changed the voltage regulator to a modern alternative that stays cool and makes the heat-sink redundant. Call it a bit of preventative future proofing but not addressing the real issues. I was definitely out of my depth as far as ram and ic`s and needed to find a professional.

       http://www.tynemouthsoftware.co.uk/ to the rescue. For those who don`t know, here resides Dave Curran, an 8bit Guru of the highest order. Reluctantly he took it on, understandably its been messed with by many unskilled hands of which I have now added myself. Secretly though I knew he liked a challenge and he didn`t let me down.

  Here`s the board after Dave worked his magic. I got a lower ram kit from "Joules Per Coulomb" YouTube AKA  zx.zigg.net and passed it on to Dave hoping to at least limit the damage. Turns out after god knows how many man hours Dave said it would be easier to list what didn`t need replaced. Maybe the cost has outweighed the outcome here but for me I now have a future proof 48k speccy I wanted, learn`t a few things along the way and gave Dave enough meat to create the mother of all blogs for himself. I can`t recommend him enough for anyone with 8bit machines in need of repair.

        My parts had arrived from Retroradionics, now Dave had sorted the board, time to give the little monkey a facelift. So what did I get!


         New membrane, rubber key mat (went for different colour) which i think is a clean look.
The face plate impressed me most, looks Sinclair factory stock. I did have to replace the double sided tape that glues the face plate to the casing with my own 3M tape as the stuff supplied was pretty useless.


        I was pleased with the look and could do with some fine cleaning to area just above the face plate. I replaced the psu with a small modern version that looks more like a mobile phone charger and bought a composite cable.

    plugged it in to my 32" retro tv, trusty Toshiba with all the right inputs. The iconic copyright screen was all i needed as i couldn`t be bothered to dig out a tape deck right now. Then i remembered my little Randomize USR 1310 command i used to type in to machines setup in shops and 10 PRINT a brand new game name that would draw crowds whilst it ran endlessly loading nothing. I was about 12 and easily entertained by mischief.

     This now joins my ZX81 and Spectrum +2 though it holds a special place for me and my brother as the beginning of all things computing/gaming in our lives anyway!

Wednesday, April 25, 2018

NEC Accusync 91V Won`t Power On!


                    I found this too hard to resist as anyone who knows me will undoubtedly know I`m a full on Amiga freak. I have previously bought the two smaller monitors from this NEC family, the 71vm (17") and 51vm (15"). They are screens that support 15KHz, retro friendly,
removing the need for expensive scandoublers or internal Amiga addons to convert the resolution. In my opinion the 15" gives the best experience, however I wont digress from the 19" fella that`s landed courtesy of Hermes couriers, the Ryan Air of logistics.


                    I did contact the seller and for an agreed sum he posted the item as it was collection only on the sale. His description pointed at a faulty ON/OFF switch which didn`t put me off as I would have easily used it hard wired ON or fitted a compatible switch. So I got the back off to clean it and have a look.


First impressions were promising, no bad smells, scorch marks or signs of anything burn`t. everything surface mounted and easily viewed, how things used to be. I took a minute to google its release:


19-inch display for high-quality multimedia enjoyment and price-conscious home users


Munich, 14th January 2004 With the NEC AccuSync® LCD91VM, NEC-Mitsubishi Electronics Display-Europe is presenting what is currently the top model in its AccuSync® all-round line. The 15-, 17- and 19-inch models in this product range are distinguished by an outstanding price/performance ratio and are based on the latest state of the art in NEC-Mitsubishi LCD technology. 
               I was sold already, the Top Model in 2004, I like to think I`m price-concious. Didn`t take long to see the problem, no multimeter, no oscilloscope, nothing required but a good pair of Mr Magoos. Both caps adjacent the Heat-sink were badly swollen. Both were 1000uF 10v DC. I ordered a 5 pack from RS Components but upped the voltage and temp rating as this will give the replacements a longer lifespan. Electrolytic Capacitor uF micro farad rating must always be equal, voltage must be the same or greater than marked on the body.
Though larger voltage usually means bigger physical size so you can`t go crazy.

 This would be my first port of call before further investigation should the monitor still have problems. Nice flat tops on new caps.
                I soldered in the replacements 1000uF @ 25vdc  instead of 10vdc. Gave everything a good clean, blown with air and wiped with Isopropol alcohol wipes before a final inspection and assembly. I had a small Dell Optiplex sitting nearby that I plugged the monitor into, no stuttering green power light but a nice solid bright beacon of contentment. Sadly the new family member would have to go attic bound to join his smaller brothers in the Amiga section till further notice as space here is the front room is becoming an issue.

             Here is a link to to Youtuber  "Modern Vintage Gamer". He`s a fantastic Amiga resource and thanks to him I was made aware of the NEC Accusync 15KHz models.
            There are lots of NEC Accusync models on Ebay etc, models 93vm etc, they are not 15KHz. As I said before, I recommend the Accusync LCD51vm as the go to Amiga screen as the screen size is more like the commodore CRT Monitors of the day, games look great with little or no adjustment and colours pop. This monitor also has built in speakers which for the Amiga is a great bonus, I do prefer a soundbar though for the full on music experience!

Saturday, April 21, 2018

SONY PLAYSTATION

 ITEM: Sony Playstation SCPH 7502

 SOURCE: Ebay item, £10 including postage, console only.

PROJECT: Clean it up, add a modchip!


          So I bought this from Flea Bay hoping it worked, as luck had it, it did. I have modded the original playstation in the 90`s, 4 wires and massive pads on the motherboards then.
This version is pretty modern, still has a parallel port though which got removed in later versions, be it hidden behind the casing or non existent. 


         I removed all screws and various components, CD laser, controller port, mobo cover etc. I had to de-solder a shielding that covered a lot of points I needed to access, this was something I had never found back at the time I modded these. 


      I set the soldering station high and made short work of it. My blank modchip can be seen looking lost on the mat. I own a K150 Pic Programmer so decided to flash the MM3 Hex to it, old crows hex file is a bit long in the tooth now, no anti stealth features etc. I got all info I needed from the Eurasia website. The programmer gave me hassle on Windows 10 but fortunately I have a little EEEPC notebook I keep with Windows XP for such headaches and com port issues. 


             With the chip ready it was time to tin it and prep it for install, out with the helping hands (crocodile clip stand). I used Kynar wire 30AWG, most console modding is made easier with this single core light weight cable. The insulation tends to burn back quickly when tinning but stops receding after a few millimeters.


Pin 2 is not used for this install
The wire is easily straightened by gently pulling it between fingers with friction.
             I checked my drawing from Eurasia and using a fibre glass pen i cleaned up my solder points, applied flux and soldered in my chip. I used extra long cable as I have a place in mind for storing the chip. Most points were easy, high heat and quick joint. Low wattage irons and poor solder without flux will not only damage the board but give a crap joint.


As you can see I applied heat shrink to the mod chip as it protects the leg joints as well as insulator. Double checked my joints with diagram.


        So this was the finished install, chip held with double sided foam tape bottom right corner.  The machine is now multi region and able to play copied back-ups of which I obviously own the original game discs. I may have to re-calibrate the laser as I remember these lasers can be picky with cd media. I ran a copy of Resident Evil 2 but could not find my game-pad, be in the attic I suspect. Happy with my  work I thought I`d earned a cold one!