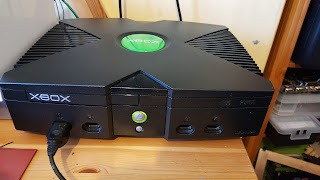
Last week I got a request for one of my modified Original Xbox consoles. I have been making these for some years for fellow retro gaming nuts like me. I loved the Amusement Arcades in the 80`s, growing up in Ireland we had to travel to Buncrana in Donegal to experience the full on beach and arcades experience similar to Scarborough or Skegness etc. With little money I was more an Arcades Urchin, watching older lads throw coin after coin into the same machines to better their high scores. They say as we get older we want to own the things that we didn`t have as kids or could not afford, this is so true!
Enter this PC based behemoth form Microsoft in the early 2000`s, built like a tank, no red rings of death here. For anyone into emulation, this is still in my eyes the best retro friendly console available. The Raspberry Pi just aint got the capabilities for 16 bit and above. There are limitations, Playstation platforms are about as much as you`ll push from this fella but all the others along the way more than make up!
I like a modchip as I don`t care for softmods and cloning drives and worrying about people messing the drive. Aladdin XT is the choice chip these days as only used variations of X-ecuter or variations are available for extortionate prices on Fleabay and Amazon.
Quite a simple install as a lot of wires are now not required to disable/enable the modchip as the old Xbox Live service is switched off.
Here I fitted an Aladdin XT plus 2 to a version 1.6 motherboard, the latest version before Microsoft ended manufacture. Most of the soldering work is underneath the motherboard, versions 1.0-1.5 do not require so much soldering. The modchip is mounted on a pin header, as are most original modchips. I do a full strip down and deep clean of all parts before any modification, check the fan is good and most importantly do a thermal paste change on the CPU and GPU processor heat-sinks.
With both heat-sinks removed, you can see the obvious clean up and replacement needed. The old compound is now doing nothing, baked on like concrete and having zero thermal transfer properties.
I have tried a lot of different weird and wonderful named products to remove the compound I like a standard WD40 soak followed by a clean with isopropanol or if really stubborn I break out the Acetone.

I leave the WD40 to soak for
a few minutes then gently use
my pry tool to agitate rather than scrape the surface.
Lint free cloth and some cotton buds with a little elbow grease and the heat sinks are as good as new.
Next ,as the console has been chipped , a brand new hard drive is essential as the stock drive is limited to 10GB and worse still is IDE. I fitted a SATA to IDE adaptor and replaced the stock ribbon cable with an Ultra ATA 80 Pin ribbon cable to improve hard drive recognition times. I fitted a brand new 2TB Seagate Barracuda sata drive I ordered from Ebuyer.
The replacement Ultra ATA ribbon cable was longer than the stock cable so some origami was necessary to get it to fit properly.
Assembly finished it was now the long task of uploading via ftp my custom menu and all the emulators and Original Xbox games. Any remaining space would be kept for save games and movies converted to play using the Xbox codec. All emulators are set up to save to the hard drive and the video output of the console is modified to HD for use on modern LCD/LED displays.
I have a web page that showcases my Retrobox and have made a small Youtube channel that shows the box in all its retro glory!
http://martylynch07.wixsite.com/retrobox
Menu`s - https://www.youtube.com/watch?v=rrOO0O3-G40&t=6s
Arcades - https://www.youtube.com/watch?v=GaFCj0vYX4g
1TB - https://www.youtube.com/watch?v=Vm6mNlcgNoM&t=1s
Below are some of my own favourites!


